 Livewire
Layout the harness
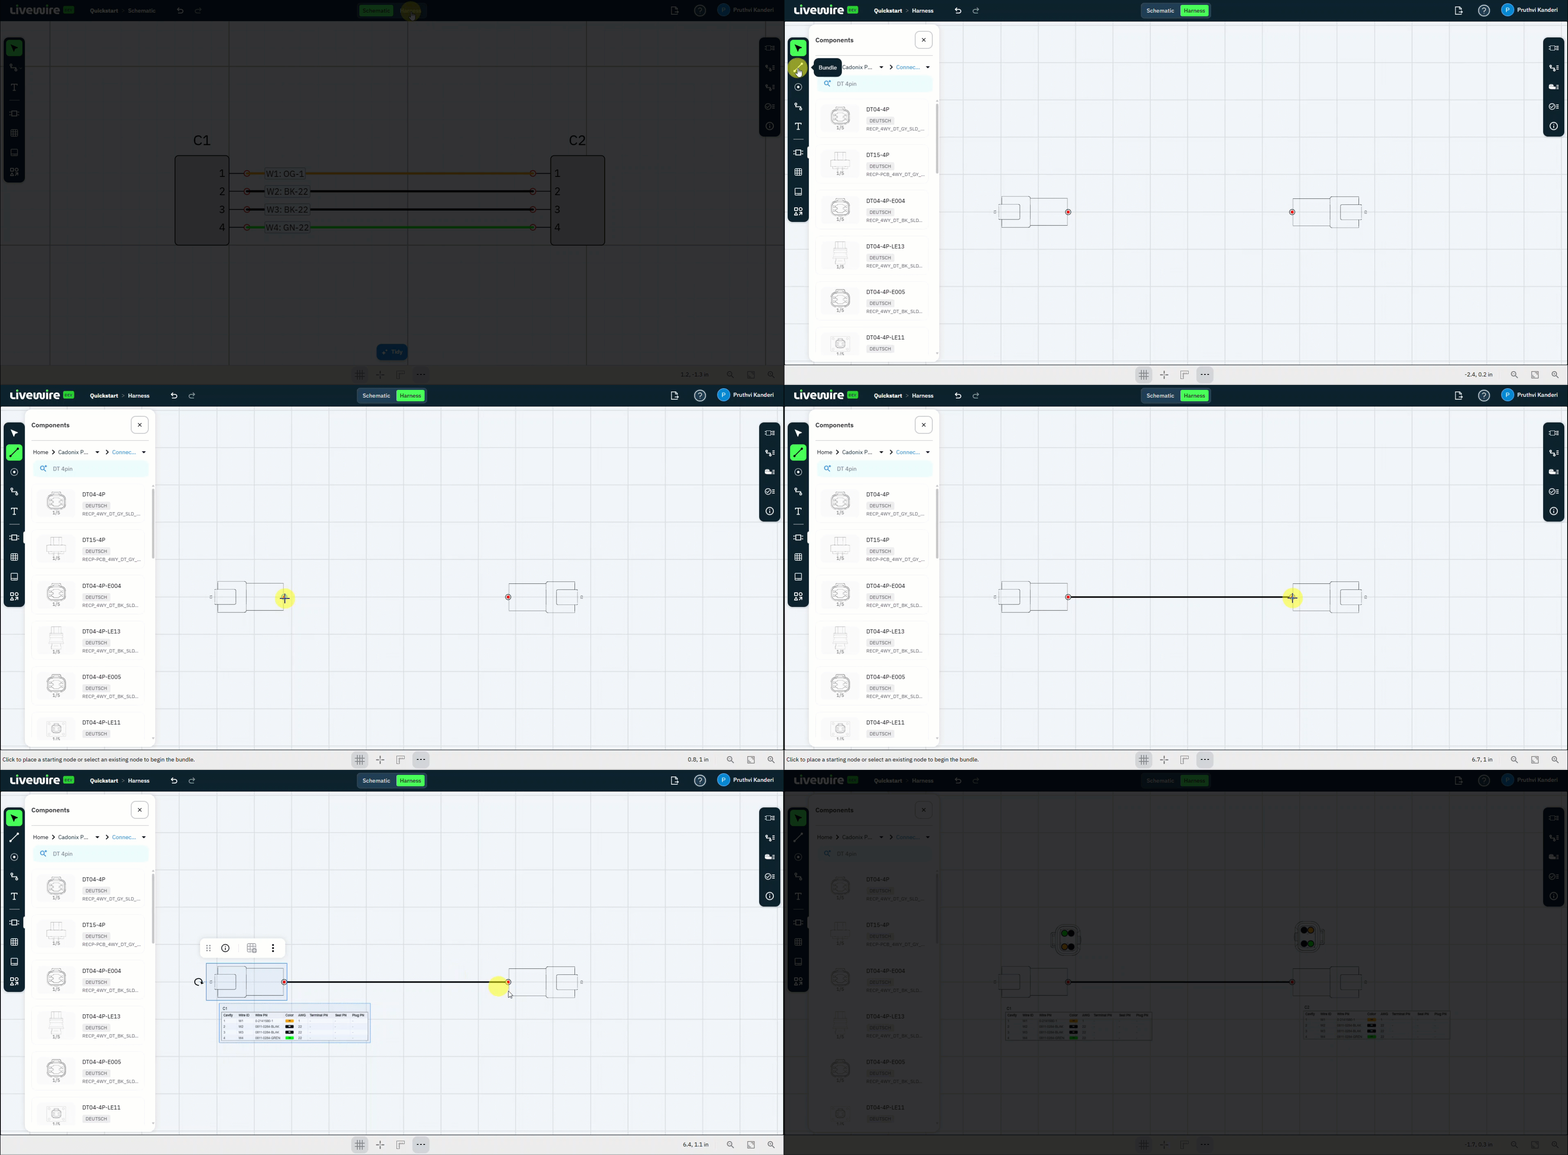
Take the design into physical form. Switch to Harness, place the connectors, join them with a Bundle, then add cavity data and turn on the loading view.
What to do
follow along above-
Switch to Harness
Use the top toggle to switch from Schematic to Harness.
-
Open the Connector Table
On the right command bar, open the Connector Table.
-
Place all components
Select all components in the table, then click Place all to drop them onto the harness canvas.
-
Close the table
Close the Connector Table to clear the workspace.
-
Move the connectors apart
Drag C1 and C2 apart to leave room for the bundle between them.
-
Select the Bundle command
On the left command bar, select Bundle.
-
Bundle the connectors
Click the node on C1, then click the node on C2 to run the bundle between them.
-
Exit the Bundle command
Press Esc to finish bundling.
-
Add a cavity table
Select a connector on the canvas, then click Add cavity table.
-
Turn on the loading view
Double-click the connector to open Connector Properties on the left. Expand Views and turn on the Loading view.
You should now have
C1 and C2 placed in Harness mode and joined by a bundle, with a cavity table added and the Loading view enabled.